[Music]
Hello, my name is Natasha Hicks, and I’m the assistant director here at THEE, and I’m with Christy Stores, our reimbursement queen, I think that’s what we said. Anyways, we’re going to discuss today talking about how to scan and send us your reimbursements via email, so you don’t have to have a scanner, you don’t have to have any big fancy equipment, you can do it from your iPhone. So we’re going to actually show you how you can do that on your iPhone. It’s very simple; it’s not taking a photo that is a JPEG, it is scanning it into a PDF document. So you can scan multiple pages and send it to us all as one beautiful PDF that we can read easily, and then we don’t have to email you back and say, “Could you please resend these documents because we can’t read them?” They’re too small or, you know, the multiple things that we end up emailing people back with, because JPEGs are a big size or they’re not clear or all the different things, especially when you’re doing receipts that have small print and stuff like that. And then you don’t have to them, and also the body of your email, right? And you don’t have to send multiple emails because they’re so big. You can just send one PDF document.
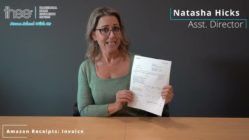
Hi there, it’s Christy here showing you step by step how to scan your documents from your iPhone. There will be a video coming further from your Android phone, but we’re going to just focus on the iPhone right now. So, first things first is you go to your Notes icon app on your iPhone. You open that up, and then on the bottom right hand corner is the icon that looks like a little pen and a square. You press on that icon, and it will open up a new note. And then when you’re in your notes, you will go on to your camera button. So you click on that, and then there will be three options, and you’ll go to the bottom option, “scan documents.” So you click on scan documents, and then you’re going to position the document or your account your phone on top of the document just right on top, and then you just press the white button. And then it will scan your document, and then there’s even a little arrows and buttons here that you can drag so you just get the document. And then if you want to keep on scanning, you’re going to go “keep scan.” And then it says, “ready for the next scan.” So then you’re going to hold your camera over, I mean your phone over the document, press the white button again. We’re going to try another one here, “retake.” And then if it doesn’t work, you just press the retake button, and you’re going to go “ready for the next scan,” and you press the white button again. And it’s just, it’s giving us trouble, it’s giving us a little bit of trouble, but you can drag. Sometimes it will just, um, um, what’s the word I’m looking for, will just portion it, we’ll just take a portion of the document, but you can drag you can drag the corners out to get your whole document, and then you will say “keep scan.” And then you’ll see go to “ready for the next scan,” and I’m going to scan the next document. Press the white button, and that one worked great, and I’m going to say “keep scan.” And so I have three pages there, and then I’m going to “save” it on the bottom right hand corner. And then you say “done,” and then you just kind of hold your um press on the document and on the top, top right hand corner there’s the share square with an arrow going up. You hit that button, and then you go over to mail, to your mail app or icon, and you hit the mail icon, and then you just will say “to,” and I’m going to email that to myself, christy.ca, and then write your subject, “reimbursement request for Christy.” And then I’m going to press the top arrow to send. So now it’s sent to me, and all the documents are in a PDF form, and that’s all you have to do. Press “done,” and you’re done.
Okay, so now that we’ve shown you how to do this with your iPhone, I just want to reiterate a big reason for why this is so important is really just to improve the amount of time that it takes for us to process all of your reimbursement requests. When you send them to us as a nice, neat PDF document, they’re easy to read, we know what you’re asking for, and we can we can process it very quickly. Unfortunately, JPEGs often come, you know, in the body of the email or as an attachment, but they’re usually, well, not usually, but I would say at least 50% of the time, we can’t read them because they’re too they’ve been compressed to email them so then they’re too blurry. So we can’t read them, and we have to be able to read it, or they’re, yeah, there’s just too many complications with the JPEGs. And so to save time so we don’t have to email you back, you know, three or four times just to get all of your receipts submitted to us, it is nice if you can send it with PDF. And the nice thing with doing it on your phone is you don’t have to have, you know, a fancy scanner or something like that, and on your iPhone, you don’t even need an app or anything, it’s just right in your notes. So it works very well, and then we can just process those reimbursements nice and fast. And yeah, I think that’s all. Thank you for watching, thank you.

You may also like